Preparing the Workspace:
Clean and Organized: Ensure your workspace is clean and organized to facilitate efficient cutting and sewing.
Tools and Equipment: Gather necessary tools such as scissors, rotary cutter, cutting mat, sewing machine, needles, and thread suitable for the chosen materials.
Cutting the Fabric:
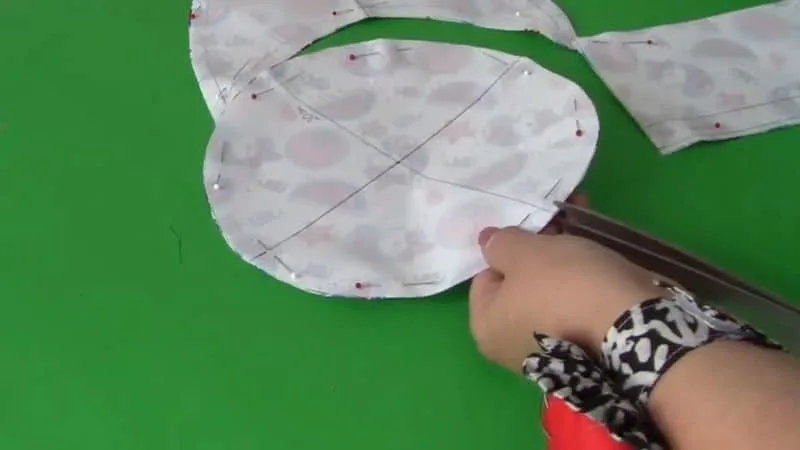
Pattern Preparation: Lay out the pattern pieces on the fabric according to the grain line and any directional prints.
Marking: Use fabric chalk or tailor�s pencil to mark around the pattern pieces, including seam allowances and any notations from the pattern.
Cutting Techniques: Cut carefully along the marked lines, ensuring smooth and even edges. Use sharp scissors or a rotary cutter for precision.
Sewing Techniques:
Choosing Stitch Types: Select appropriate stitch types on your sewing machine based on the fabric and design of the hat (e.g., straight stitch, zigzag stitch, or specialized stitches for stretch fabrics).
Seam Allowances: Follow the specified seam allowances from your pattern. Press seams open or to one side as instructed for neat finishing.
Handling Curves and Corners: For hats with curved or intricate seams (e.g., crown or brim), sew slowly and carefully to maintain accuracy. Use pins or clips to secure seams before sewing.
Adding Structure with Interfacing:
Applying Interfacing: Depending on the design, add interfacing to certain parts of the hat (e.g., crown or brim) to provide structure and shape retention.
Fusible vs. Sew-In: Choose between fusible interfacing (adheres with heat) or sew-in interfacing (stitched in place) based on the fabric and desired stiffness.
Detailing and Embellishments:
Attaching Trims: Once the basic hat structure is sewn together, attach trims, bands, or decorative elements as per the design. Ensure these are securely stitched for durability.
Finishing Touches: Trim excess threads, press the finished hat lightly with an iron (using appropriate settings for the fabric), and inspect for any remaining adjustments needed.
Quality Control and Fit Testing:
Fit and Comfort: Try on the hat or use a fitting form to ensure it fits well and comfortably.
Adjustments: Make any final adjustments as necessary, such as resizing or refining the shape of the hat.
Documentation and Record-Keeping:
Record Details: Keep a record of the materials used, techniques applied, and any adjustments made during the cutting and sewing process. This documentation helps in replicating successful designs and troubleshooting issues in future projects.
By mastering these cutting and sewing techniques, you can produce well-crafted hats and caps that showcase both your skill and attention to detail. Each step contributes to the overall quality and functionality of the finished product, ensuring satisfaction for both yourself as a maker and your customers.


